はじめに
前回の記事でログに関して、触れていますが今回もログに関してです。
今回は使いやすく、さらに見た目がわかりやすいログのプラグインを紹介します。
環境
- Flutter 2.5.3
- logger 1.1.0
実装方法
プラグインの最新バージョンを確認
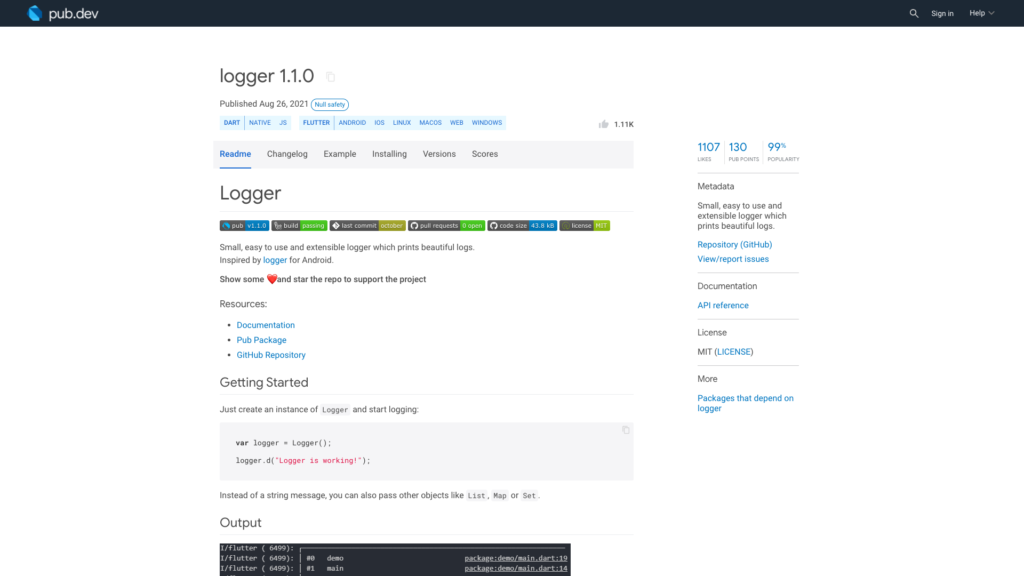
下記のサイトにアクセスし、バージョンを確認します。

logger | Dart package
Small, easy to use and extensible logger which prints beautiful logs.
記事作成の時点では1.1.0が最新バージョンでした。
プラグインのインストール
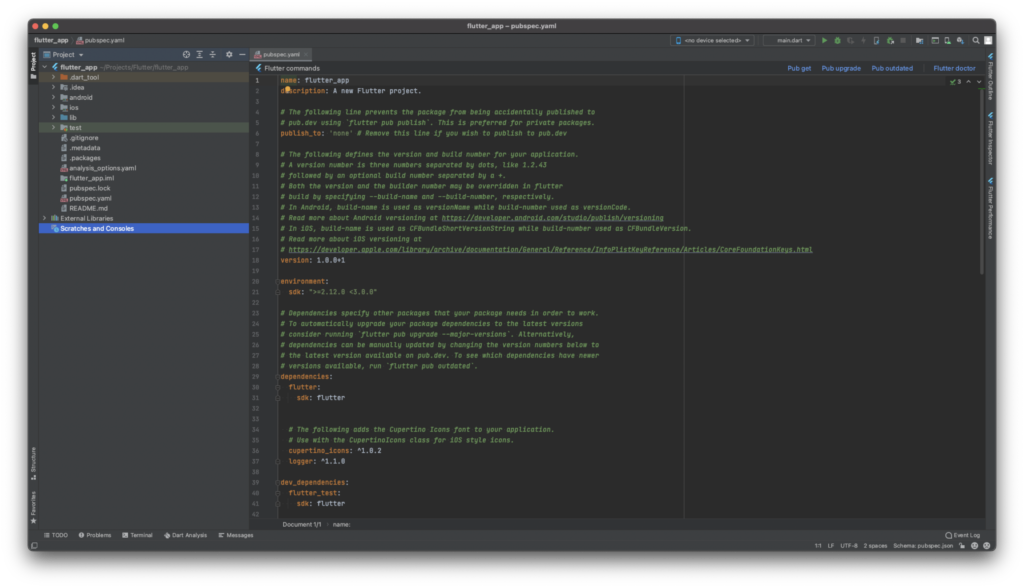
pubspec.yamlのdependenciesに「device_preview: ^0.8.0」を追記します。
または常に最新版を使う設定の「device_preview: any」を追記します。
environment:
  sdk: ">=2.12.0 <3.0.0"

# Dependencies specify other packages that your package needs in order to work.
# To automatically upgrade your package dependencies to the latest versions
# consider running `flutter pub upgrade --major-versions`. Alternatively,
# dependencies can be manually updated by changing the version numbers below to
# the latest version available on pub.dev. To see which dependencies have newer
# versions available, run `flutter pub outdated`.
dependencies:
  flutter:
    sdk: flutter


  # The following adds the Cupertino Icons font to your application.
  # Use with the CupertinoIcons class for iOS style icons.
  cupertino_icons: ^1.0.2
logger: ^その後、プロジェクト配下で「flutter pub get」コマンドを実行
よくわからない場合はAndroid Studioでpubspec.yamlファイルを開くと右上に「Pub get」ボタンがあるのでそれを押して下さい。
サンプルコード
import 'package:flutter/material.dart';
import 'package:logger/logger.dart';

void main() {
  runApp(const MyApp());
}

class MyApp extends StatelessWidget {
  const MyApp({Key? key}) : super(key: key);

  @override
  Widget build(BuildContext context) {
    return MaterialApp(
      title: 'Flutter Demo',
      theme: ThemeData(
        // is not restarted.
        primarySwatch: Colors.blue,
      ),
      home: const MyHomePage(title: 'Flutter Demo Home Page'),
    );
  }
}

class MyHomePage extends StatefulWidget {
  const MyHomePage({
    Key? key,
    required this.title,
  }) : super(key: key);

  final String title;

  @override
  State<MyHomePage> createState() => _MyHomePageState();
}

class _MyHomePageState extends State<MyHomePage> {
  final _logger = Logger();

  @override
  Widget build(BuildContext context) {
    return Scaffold(
      appBar: AppBar(
        title: Text(widget.title),
      ),
      body: Center(
        child: Column(
          mainAxisAlignment: MainAxisAlignment.center,
          children: <Widget>[
            ElevatedButton(
              style: ElevatedButton.styleFrom(primary: Colors.white),
              onPressed: () {
                _logger.v('Verbose log');
              },
              child: const Text(
                'Verbose log',
                style: TextStyle(color: Colors.black),
              ),
            ),
            ElevatedButton(
              style: ElevatedButton.styleFrom(primary: Colors.white),
              onPressed: () {
                _logger.d('Debug log');
              },
              child: const Text(
                'Debug log',
                style: TextStyle(color: Colors.black),
              ),
            ),
            ElevatedButton(
              style: ElevatedButton.styleFrom(primary: Colors.blue),
              onPressed: () {
                _logger.i('Info log');
              },
              child: const Text('Info log'),
            ),
            ElevatedButton(
              style: ElevatedButton.styleFrom(primary: Colors.yellow),
              onPressed: () {
                _logger.w('Warning log');
              },
              child: const Text('Warning log'),
            ),
            ElevatedButton(
              style: ElevatedButton.styleFrom(primary: Colors.red),
              onPressed: () {
                _logger.e('Error log');
              },
              child: const Text('Error log'),
            ),
            ElevatedButton(
              style: ElevatedButton.styleFrom(primary: Colors.red),
              onPressed: () {
                _logger.wtf('What a terrible failure log');
              },
              child: const Text('What a terrible failure log'),
            ),
          ],
        ),
      ),
    );
  }
}
結果
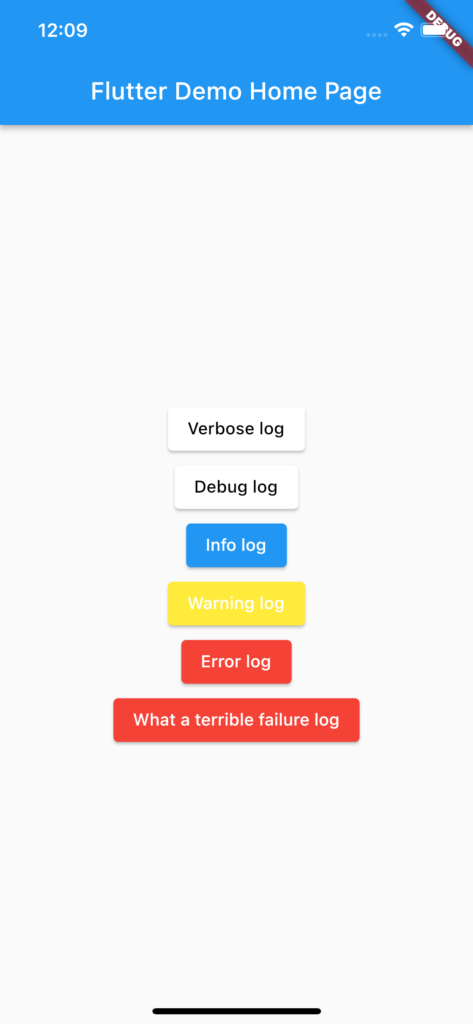
動作させるとこんな感じ。
それぞれのボタンを押すとこんな感じでRunにログが出力されます。
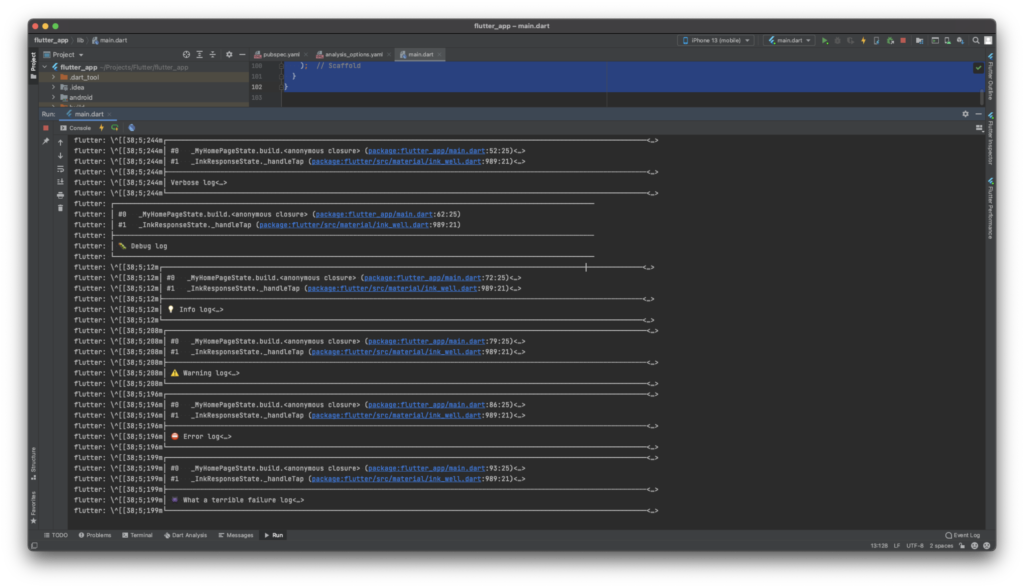
該当の出力を目立たせてくれるので便利そうです。
ただ文字化け?っぽい部分があるのですが原因はよくわかりませんでした。
おすすめの機能
- 特定のログレベルのみを表示できるよう設定が可能。
- オプションが多くありログに対して色々と情報を付与できる
他にも良い機能はたくさんあるので是非サイトで確認してみてください。
さいごに
printよりも便利そうなので、loggerに切り替えようかと思います。



コメント