はじめに
Flutterで開発で必ず利用するWidget。
そのWidgetがどんな機能を持っているのかを理解し、多く知っていることがFlutter開発には重要です。
そこで今回はFlutter公式が数年前からYouTubeで公開しているWidgetを紹介する「Flutter Widget of the Week」を実際に第1回からやっていこうと思います。
あくまで自分が動画みて自分の解釈なので間違っているかもしれません。
またコードはGitHubに公開していますので見たい方は自由に参考にしてください。
Flutter Widget of the Week
環境
- Flutter 2.5.3
記事にした時点でのバージョンです。GitHubに公開しているのは常に最新の安定版を使う予定です。
#1 SafeArea
SafeAreaとは
昨今のデバイスは16:9等の長方形の画面だけで操作することは稀になり、通知バーや操作ボタンが入り込んだり、丸角やノッチが画面を妨げいたりと、レイアウトが複雑になることがあります。
そういう場合に便利なのがSafeArea。
SafeAreaは内部的にMediaQueryを使い画面の範囲を調べてくれて、SafeAreaの子ウィジットを適切なサイズに調整してくれます。
アプリの表示画面が合っていない場合、SafeAreaで囲めば iOSでもAndroidでも適切な画面領域に表示してくれます。
また画面サイズを一部変えたくない場合は指定することもできます。
基本的には Scaffold の body を SafeArea で囲むのが良いとのことです。
サンプルコード
import 'package:flutter/material.dart';

class SamplePage001 extends StatelessWidget {
  const SamplePage001({
    Key? key,
  }) : super(key: key);

  @override
  Widget build(BuildContext context) {
    return Scaffold(
      appBar: AppBar(
        title: const Text('SafeArea'),
      ),
      body: SafeArea(
        child: ListView(
          children: [
            ListTile(
              title: const Text('SafeAreaあり'),
              onTap: () {
                Navigator.push<void>(
                  context,
                  MaterialPageRoute(
                    builder: (context) {
                      return const _SamplePage001SubPage1();
                    },
                  ),
                );
              },
            ),
            ListTile(
              title: const Text('SafeAreaなし'),
              onTap: () {
                Navigator.push<void>(
                  context,
                  MaterialPageRoute(
                    builder: (context) {
                      return const _SamplePage001SubPage2();
                    },
                  ),
                );
              },
            ),
          ],
        ),
      ),
    );
  }
}

class _SamplePage001SubPage1 extends StatelessWidget {
  const _SamplePage001SubPage1({
    Key? key,
  }) : super(key: key);

  @override
  Widget build(BuildContext context) {
    return Scaffold(
      appBar: AppBar(
        title: const Text('SafeArea'),
      ),
      body: SafeArea(
        child: ListView(
          children: List.generate(
            100,
            (i) => const Text('This is some text.'),
          ),
        ),
      ),
    );
  }
}

class _SamplePage001SubPage2 extends StatelessWidget {
  const _SamplePage001SubPage2({
    Key? key,
  }) : super(key: key);

  @override
  Widget build(BuildContext context) {
    return Scaffold(
      appBar: AppBar(
        title: const Text('SafeArea'),
      ),
      body: ListView(
        children: List.generate(
          100,
          (i) => const Text('This is some text.'),
        ),
      ),
    );
  }
}
結果
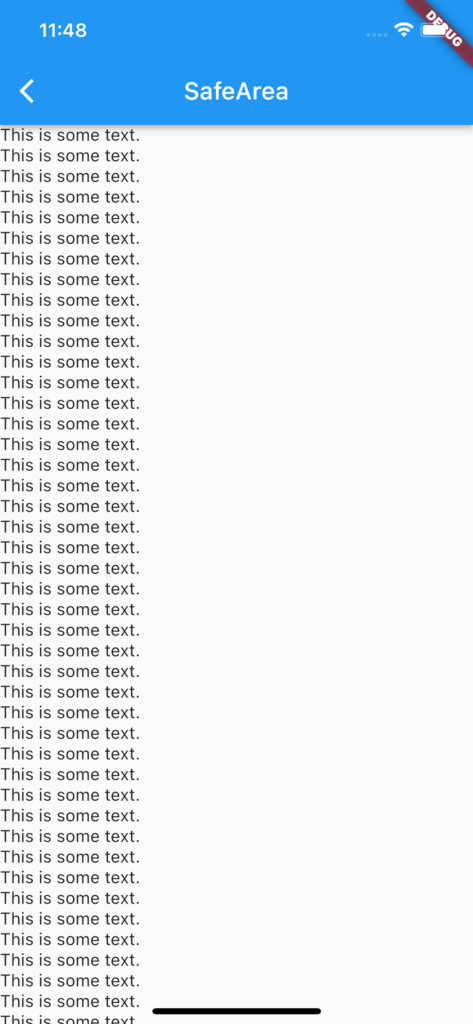
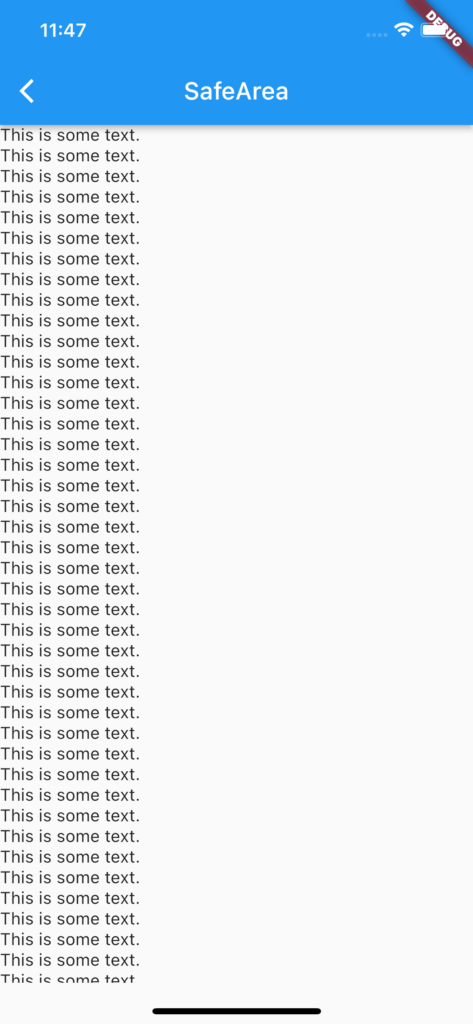
画面はiPhone13のシミュレーターです。SafeAreaを使っていない場合、下記のように画面下の部分がホームバーにはみ出してしまっています。

しかしSafeAreaで囲った場合は下記のようにホームバーの上までに調整してくれています。

動画
公式リファレンス
#2 Expanded
Expandedとは
ほぼすべてのFlutterのレイアウトには列と行があり、キレイに整列されています。
子ウィジットの間隔を狭めたり、広げたりすることができますが、特定の子ウィジットのみを引き延ばす場合にはExpandedウィジットを利用します。
その子ウィジットをExpandedウィジットで囲むだけで自動でウィジットが広がってくれます。
行や列にその子ウィジットを配列する場合は、サイズが変更しないものから配置し、残りの空間を Expanded のようにサイズが変更できるもので埋めます。
flexプロパティを指定するだけで広がりの優先順位をつけることもできます。
サンプルコード
import 'package:flutter/material.dart';

class SamplePage002 extends StatelessWidget {
  const SamplePage002({
    Key? key,
  }) : super(key: key);

  @override
  Widget build(BuildContext context) {
    return Scaffold(
      appBar: AppBar(
        title: const Text('Expanded'),
      ),
      body: SafeArea(
        child: Center(
          child: Column(
            mainAxisAlignment: MainAxisAlignment.center,
            children: [
              const Text('Expandedなし'),
              Container(
                padding: const EdgeInsets.all(5),
                color: Colors.lightBlue,
                height: 80,
                child: Row(
                  children: const [
                    _SamplePage002Child(),
                    _SamplePage002Child(
                      color: Colors.purple,
                    ),
                    _SamplePage002Child(),
                    _SamplePage002Child(
                      color: Colors.purple,
                    ),
                    _SamplePage002Child(),
                  ],
                ),
              ),
              const SizedBox(height: 10),
              const Text('Expanded Flexなし'),
              Container(
                padding: const EdgeInsets.all(5),
                color: Colors.lightBlue,
                height: 80,
                child: Row(
                  children: const [
                    _SamplePage002Child(),
                    Expanded(
                      child: _SamplePage002Child(
                        color: Colors.purple,
                      ),
                    ),
                    _SamplePage002Child(),
                    Expanded(
                      child: _SamplePage002Child(
                        color: Colors.purple,
                      ),
                    ),
                    _SamplePage002Child(),
                  ],
                ),
              ),
              const SizedBox(height: 10),
              const Text('Expanded Flexあり'),
              Container(
                padding: const EdgeInsets.all(5),
                color: Colors.lightBlue,
                height: 80,
                child: Row(
                  children: const [
                    _SamplePage002Child(),
                    Expanded(
                      flex: 2,
                      child: _SamplePage002Child(
                        color: Colors.purple,
                      ),
                    ),
                    _SamplePage002Child(),
                    Expanded(
                      flex: 1,
                      child: _SamplePage002Child(
                        color: Colors.purple,
                      ),
                    ),
                    _SamplePage002Child(),
                  ],
                ),
              ),
            ],
          ),
        ),
      ),
    );
  }
}

class _SamplePage002Child extends StatelessWidget {
  const _SamplePage002Child({
    Key? key,
    this.color = Colors.yellow,
  }) : super(key: key);

  final Color color;

  @override
  Widget build(BuildContext context) {
    return Container(
      margin: const EdgeInsets.all(5),
      height: 50,
      width: 50,
      color: color,
    );
  }
}
結果
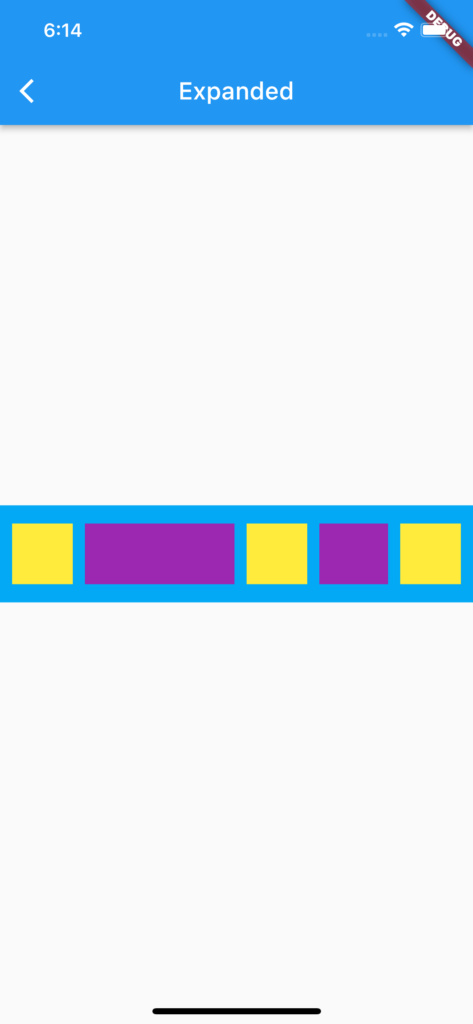
画面のように紫色のウィジットのみ引き伸ばされているのがわかります。
さらにflexプロパティを指定しているのでExpandedウィジットを使っているウィジットでも引き伸ばされ方が違うのがわかります。

動画
公式リファレンス
さいごに
2個ペースじゃ遅いのでもっとやらなくては。。。


コメント